


THE SONICにお問い合わせ用のデザインを追加しました。
お問い合わせではプラグイン「Contact Form 7」を使っています。
くま
せっかくなので「Contact Form 7」を使ったお問い合わせページの使い方をやさしく説明していきますね
目次
お問い合わせページのデザイン
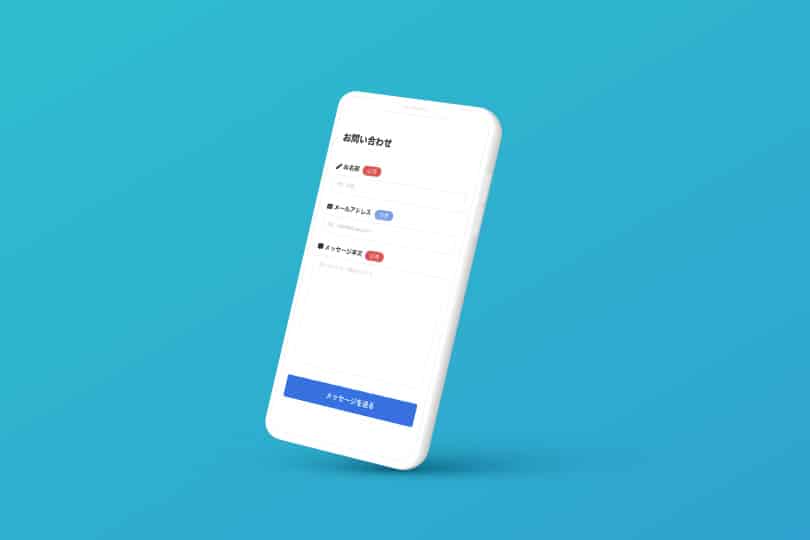
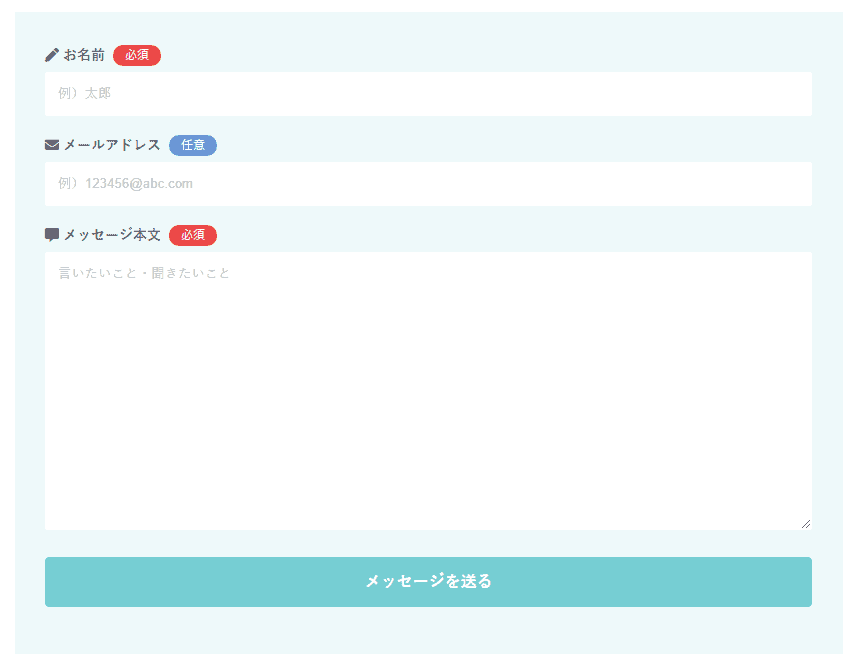
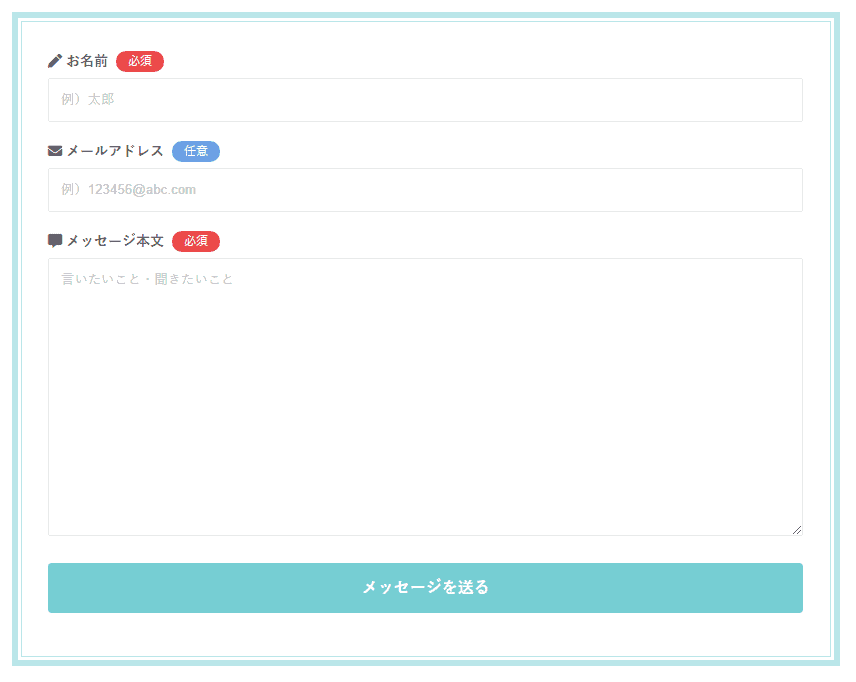
まずは、どんなデザインになるかを見てみましょう。
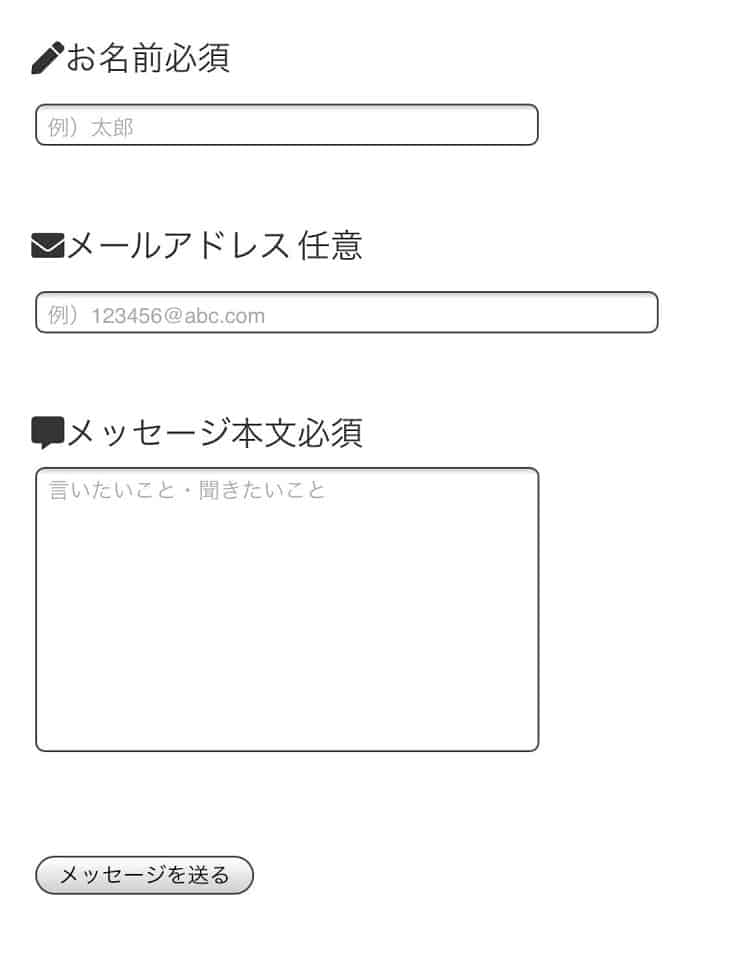
デザイン適用前
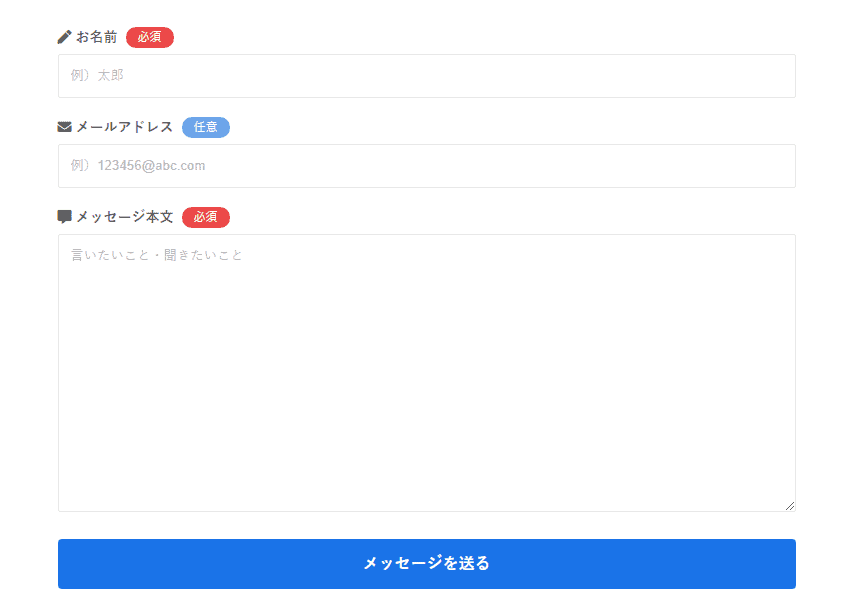
デザイン適用後
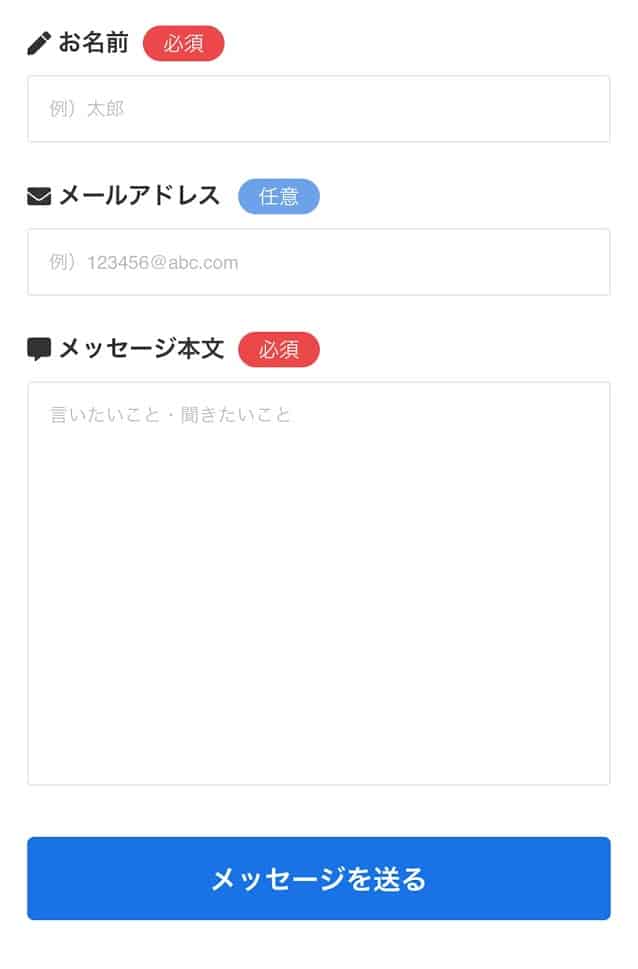
少し形を整えて、ちょっとゆとりを持たせました。どんなサイトでも使いやすい優等生をイメージ。
くま
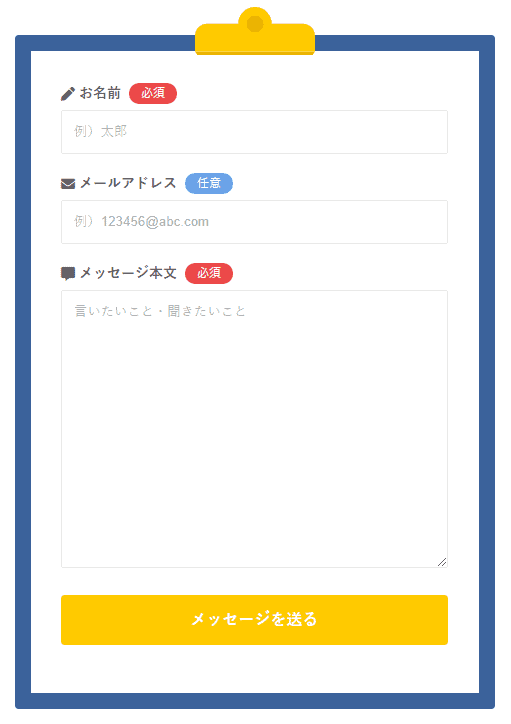
あとから紹介しますが、グループブロックを組み合わせるとオリジナリティも出せたりします
さて、プラグインの設定をやっていきましょう。
Contact Form 7を設定しよう

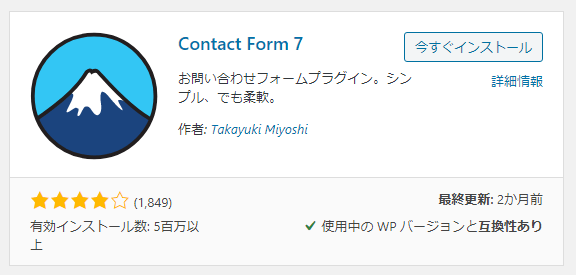
「Contact Form 7」
お問い合わせページを作るために使うプラグインで有名。シンプルな設定でお手軽です。
設定の手順を少し細かく見ていきましょう。
- プラグインをインストール・有効化
- お問い合わせを新規作成
- お問い合わせに表示する項目を設定
- 投稿ページにお問い合わせを設置
お問い合わせは一度作ってしまえば、ほとんどメンテナンスしません。
設定に慣れていなくても10分程度でおわるので、ちゃちゃっとやってしまいましょう。
① インストール・有効化
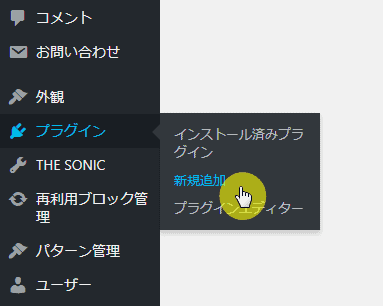
ワードプレスのサイドメニューにあるプラグイン>新規追加をクリックします。

右上の検索欄に「7」と入力しましょう
検索結果に「Contact Form 7」が出てきますので、今すぐインストール>有効化をクリックします
はい、これでプラグインをワードプレスに追加することができました。
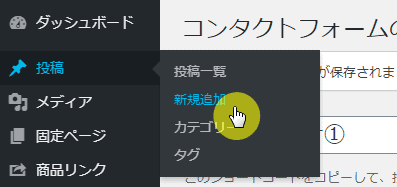
次は、お問い合わせを新規作成していきましょう。
② 新規作成
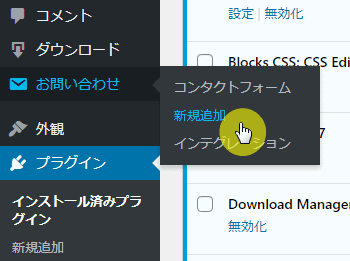
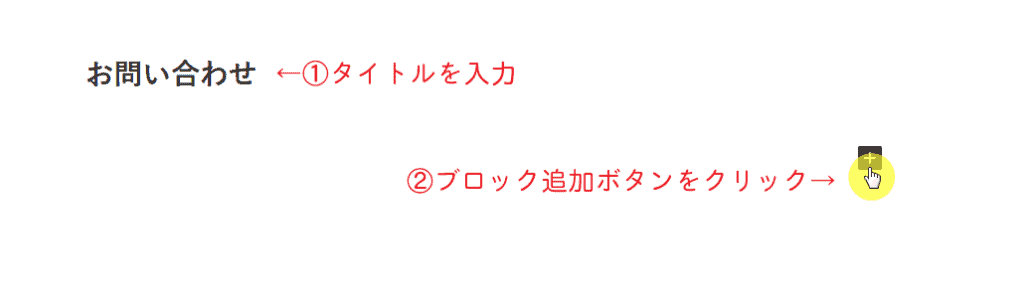
プラグインの有効化が終わると、サイドメニューにお問い合わせが表示されます。お問い合わせ>新規追加をクリックしましょう。
このような画面に切り替わります。
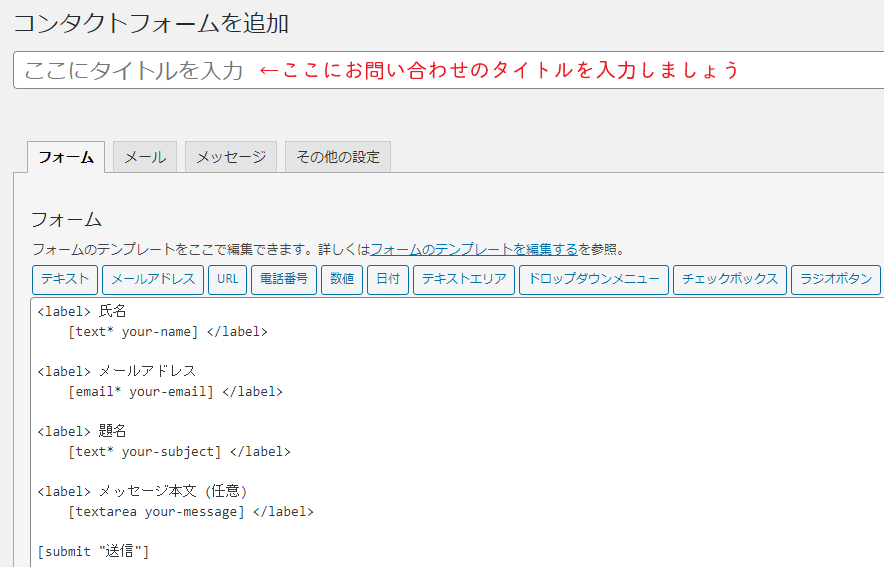
タイトルは自分がわかりやすいように適当につけましょう。

タイトルの入力が終わったら、ひとまず保存しておきます。
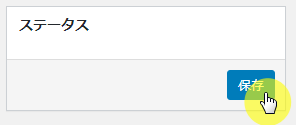
右上と左下にある保存ボタンをクリック
保存ボタンを押すとタイトル下にコードやら説明文がでてきますが、気にしなくて大丈夫です。THE SONICでは使いません。
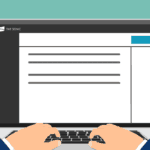
では、お問い合わせの中身を設定していきます。
③ 項目を設定
お問い合わせフォームに入力してもらう項目を決めていきましょう。

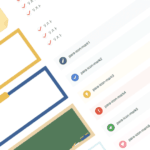
項目はたくさんありますが、よく使うのは上の画像で番号がついている4つです。
- テキスト(なんだかんだよく使うテキスト入力してもらう項目)
- メールアドレス
- テキストエリア(メッセージなど本文を書いてもらう大きなボックス項目)
- 送信ボタン
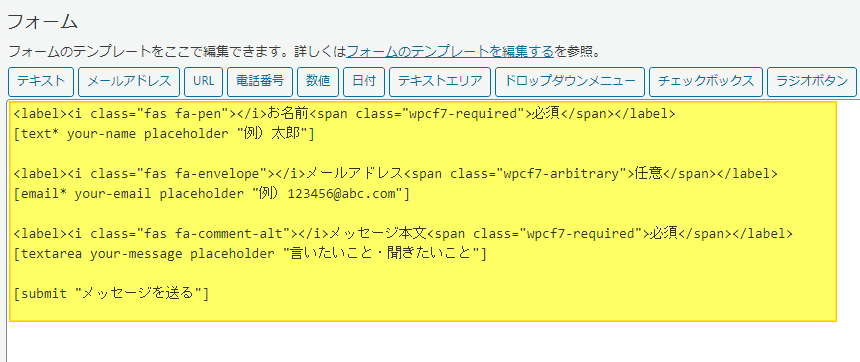
いったん全部消して、新しく追加
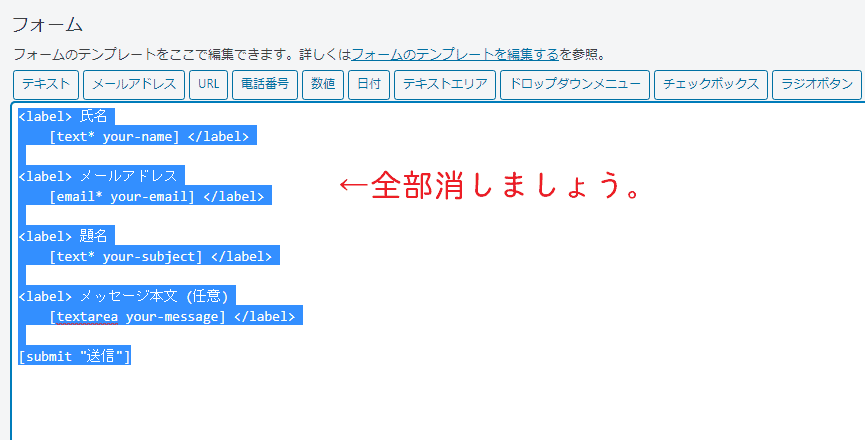
Contact Form 7では、親切に基本的な項目を最初から書いてくれています。
ただし、ちょっと癖があるので、いったんすべて消しましょう。
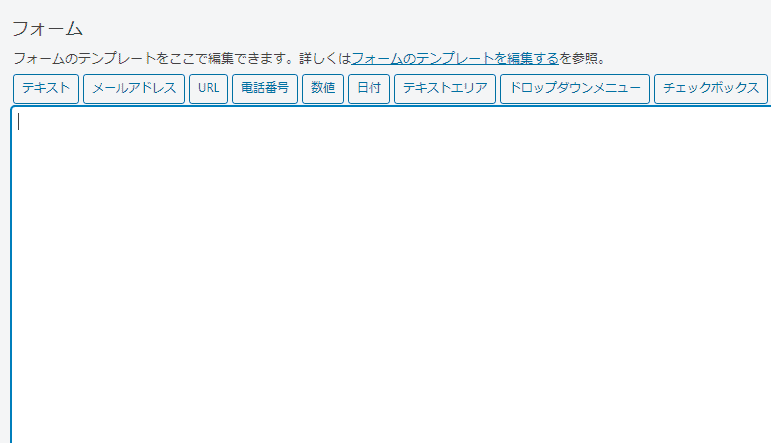
まっさらになったところに以下の全てコピーを押して、貼り付けます。
<label><i class="fas fa-pen"></i>お名前<span class="wpcf7-required">必須</span></label>
[text* your-name placeholder "例)太郎"]

<label><i class="fas fa-envelope"></i>メールアドレス<span class="wpcf7-arbitrary">任意</span></label>
[email* your-email placeholder "例)123456@example.com"]

<label><i class="fas fa-comment-alt"></i>メッセージ本文<span class="wpcf7-required">必須</span></label>
[textarea* your-message placeholder "言いたいこと・聞きたいこと"]

[submit "メッセージを送る"]
貼り付けるとこんな感じになります。
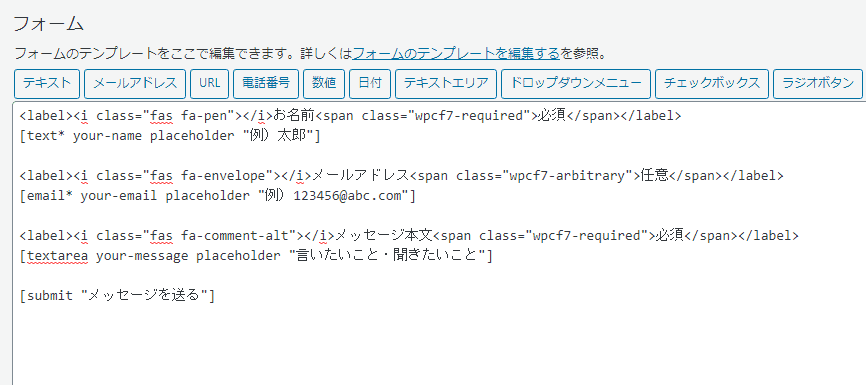
細かい部分の変更などは後で説明しますので、ここまでできたら保存を押しましょう。
次はいよいよ実際のページに追加です。
④ ページに設置
作ったお問い合わせを投稿ページに追加してどんな感じで表示されるか見ていきましょう。
サイドメニューにある投稿>新規追加をクリックします
いつも記事を書いている画面になるので、ひとまずタイトルを入力しましょう。
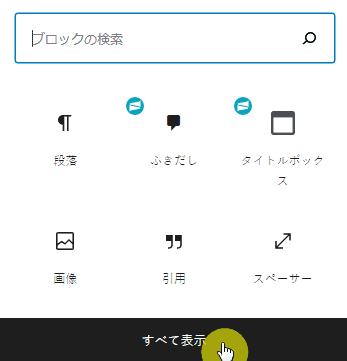
そしてすべて表示をクリック
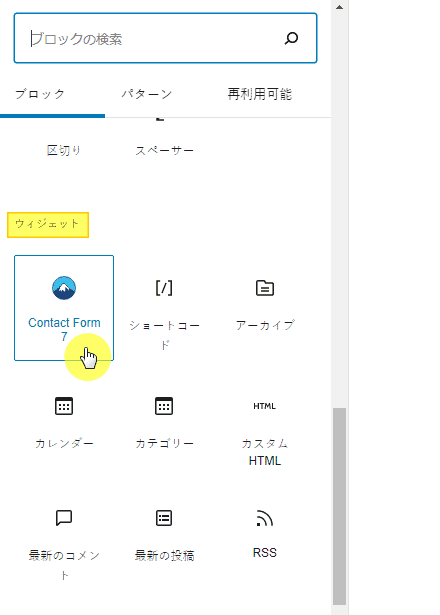
ブロックの種類がたくさんでてきますので、ウィジェットのContact Form7を選びます
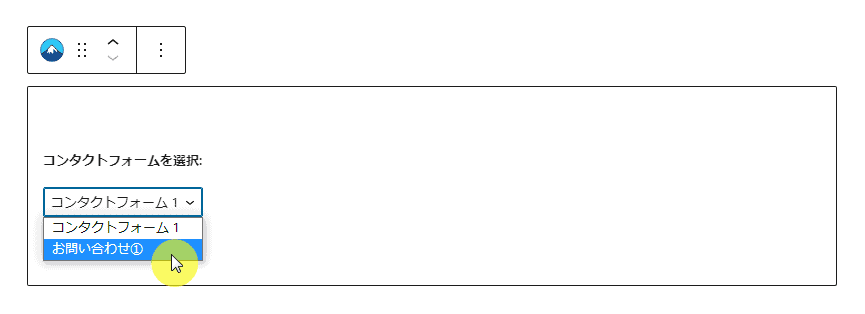
お問い合わせ用の専用ブロックが追加されますので、先ほど作ったものを選択します。
くま
はい!ではここでどんな表示になるか「プレビュー」で見てみましょう
これで完成です。
contact form 7の使い方に関しては公式ページで確認してくださいね。

もっとシンプルなお問い合わせページにしたいとき
固定ページ>ページ属性>テンプレート>固定ページ1カラム(パンくずとボタンなし)を選ぶとすっきりしたページになると思います。
項目の詳しい説明
ブロックエディタに慣れた人にとっては、上の画面を見ただけでびっくりしちゃいますよね。
ここでは、項目のタイトル部分を説明していきますね。
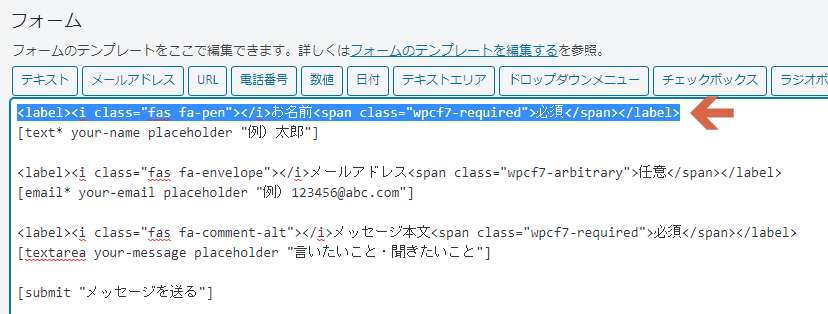
上の青い部分は
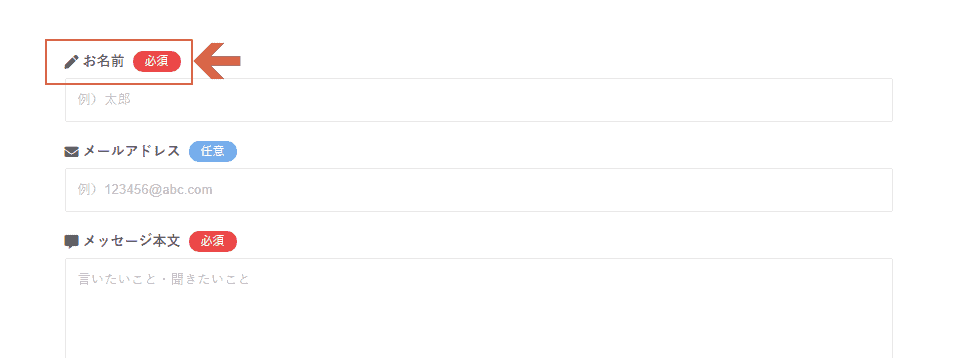
上の項目タイトル部分に対応しています。
labelタグで囲んでいる部分が項目タイトルになります。
<label>項目タイトル</label>iタグ部分はアイコンになります。公式サイトで好きなアイコンに変更できます。
<i class="fas fa-pen"></i>spanタグ部分は「必須」「任意」になるので、手動で追加してください。
<span class="wpcf7-required">必須</span><span class="wpcf7-arbitrary">任意</span>くま
対応している部分をよく見れば、自分でも簡単に変更できますよ♪
おすすめの使い方を紹介
グループブロックと組み合わせる
グループブロックと組み合わせることでデザインを変更できます。
mark2との組み合わせ
mark7との組み合わせ
クリップボードとの組み合わせ
黒板との組み合わせ
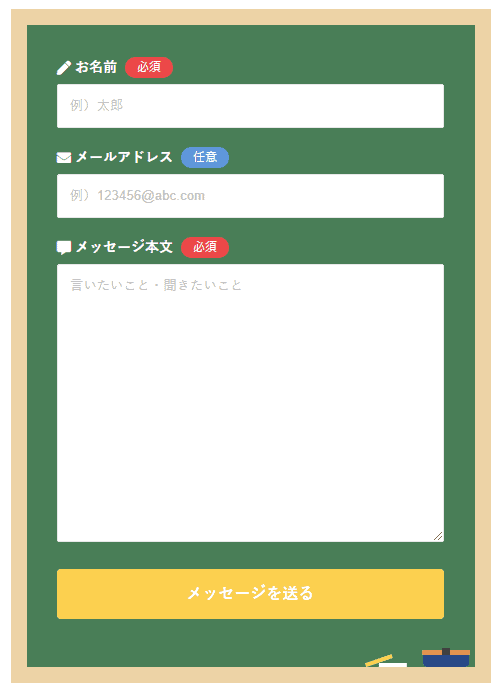
※ ボタンの色は手動で変更しています。(CSS)
組み合わせ方はかんたんです。
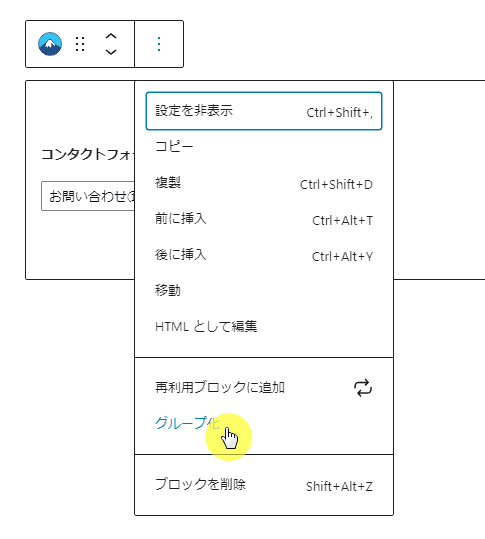
Contact Form7のブロックを選択して、グループ化します。
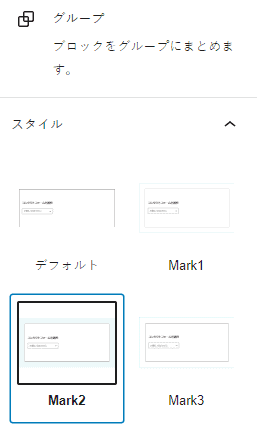
あとはグループブロックのスタイルを選べば完了
くま
組み合わせしてみよう
カスタマイズなどのヒント
.wpcf7-submit {
    background: #カラーコード;
}@media (max-width: 1023px) {
.wpcf7-submit {
width: スマホのときのサイズ;
}}
@media (min-width: 1024px) {
.wpcf7-submit {
width: パソコンのときのサイズ;
}}@media (min-width: 1024px) {
.wpcf7-text, .wpcf7-textarea {
width: auto;
}}他テーマ用のCSS
.wpcf7 {
border-radius: 8px;
}
.wpcf7 * {
box-sizing: border-box;
}
.wpcf7 label + br {
display: none;
}
.wpcf7 label {
display: flex;
font-weight: 600;
font-size: 14px;
align-items: center;
margin-bottom: 4px;
}
.wpcf7 p {
margin-bottom: 1em;
}
.wpcf7-text,
.wpcf7-textarea {
background-color: #fff;
border: 1px solid #e8e8e8;
line-height: 2;
border-radius: 2px;
width: 100%;
padding: 8px 12px;
-webkit-appearance: none;
}
.wp-block-group .wpcf7-text,
.wp-block-group .wpcf7-textarea {
border: 1px solid #fff;
}
.wpcf7-text:focus,
.wpcf7-textarea:focus {
border: 1px solid #b8b8b8;
outline: none;
}
.wpcf7-textarea {
resize: vertical;
font-family: “Helvetica”,”Arial”,YuGothic,”Yu Gothic”,”Hiragino Sans”,”ヒラギノ角ゴシック”,”メイリオ”,Meiryo,”MS Pゴシック”,”MS PGothic”,sans-serif;
}
.wpcf7 *::placeholder {
color: #bbb;
}
.wpcf7-select {
padding: 8px;
border: 1px solid #e8e8e8;
}
.wpcf7-checkbox span.wpcf7-list-item:first-child,
.wpcf7-radio span.wpcf7-list-item:first-child {
margin-left: 0;
}
.wpcf7-list-item label {
font-weight: 500;
}
.wpcf7-submit {
background: #1a73e8;
color: #fff;
border: none;
padding: 12px;
width: 100%;
font-size: 16px;
border-radius: 4px;
font-weight: 600;
cursor: pointer;
transition: opacity 0.3s;
-webkit-appearance: none;
}
.wpcf7-submit:hover {
opacity:.7;
}
div.wpcf7 .ajax-loader {
display: block;
width: 0;
height: 0;
}
.wpcf7 i {
margin-right: 4px;
}
.wpcf7-arbitrary,
.wpcf7-required {
color: #fff;
padding: 0 12px;
font-size: 12px;
font-weight: 500;
border-radius: 12px;
margin-left: 8px;
}
.wpcf7-required {
background: #ec4848;
}
.wpcf7-arbitrary {
background: #6ca3ea;
}
SONIC用にCSSを作成しましたが、他テーマでも使いたい人はこちらのCSSを「追加CSS」などに貼り付けてください。
お問い合わせページだけでCSSは読み込めばいいので、ページごとにCSSを追加できるテーマの人はそこに貼り付けてもいいかもしれませんね。